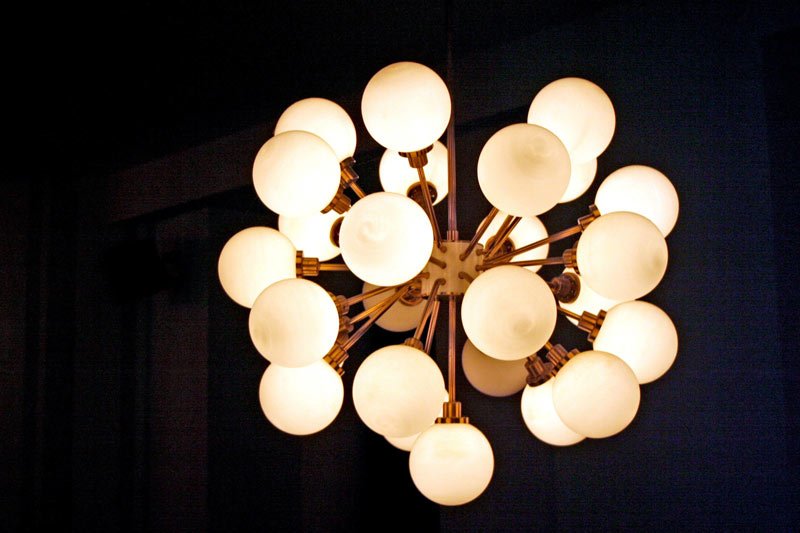
A glass ball chandelier is an elegant way to decorate your home, adding an extra touch of class to any room. But it can be quite tricky to install one! Follow these steps to hang the perfect glass ball chandelier in any room of your house.
Choose the Right Size
Before getting started, you’ll need to choose how big of a glass ball chandelier you’d like. Size is important since it directly affects both cost and design. Typically, larger ball chandeliers are for large dining rooms or great rooms, while smaller ones typically complement seating areas or guest bathrooms. If you know which room you’re hanging your chandelier in, think about where it will hang within that space. Will it be at eye level? Will your guests look up at it? When picking out your fixture size, keep these questions in mind so that you can get just what you want.
The simple fact of choosing a bigger size means spending more money. But don’t worry—you can always add more balls once you start shopping! Once you decide on a general size for your glass ball chandelier, decide if one or two tiers would be best for your space. For example, when creating an overhead lighting element near an entryway, ceiling height may dictate whether you need one tier (the standard) or two (the preferred option). Take into account ceilings and features such as beams when deciding which will work best for your home.
Choose a Suitable Fixture
The first step in hanging your new glass ball chandelier is finding an appropriate fixture. When shopping for fixtures, you’ll find that there are generally two types of lighting available for purchase: pendant lights and ceiling lights. Pendant lights are easy to install on their own, but chandeliers are designed to be installed on a ceiling rod using chains or cable. Here’s how to make sure that happens: While most chandeliers require mounting hardware (to hold it against the ceiling), consider installing an LED option.
These models simply plug into any standard outlet with no extra wiring needed; they’re also lightweight and create less heat than conventional bulbs, which keeps everyone happy. Plus, they produce very little glare thanks to their high-quality optics and excellent color rendering index (CRI). Finding matching chains for larger chandeliers can be tricky since a chain is sized by length rather than weight capacity.

Prepare Hanging Hardware
A glass ball chandelier like most any other requires hanging hardware. The big difference is that your light fixture will be much lighter than it looks; however, you’ll still want to use at least two people for installation. You can do it yourself or hire an electrician if needed. Two people are also required because after all of your hard work in making sure your chandelier fits perfectly, you don’t want to have to start over with having to find new brackets. As with any hanging light fixture, before actually attaching anything to wall studs, make sure they are adequately secured by nailing them in first.
If there are no studs behind where you plan on installing your light then you will need mounting anchors. Your local home improvement store should have these in stock, but if not you should be able to get them easily enough online. They’re relatively inexpensive and easy to install–just follow directions carefully! Make sure they’re sturdy enough for how heavy your chandelier is going to end up being once completed. When in doubt–always err on the side of safety!

Complete Guide on Hanging Glass Ball Chandeliers
First, remove excess dust and debris from your ceiling. Next, prepare yourself to install your mounting brackets onto your ceiling. Make sure you have all of the necessary hardware—mounting brackets with screws included—and lay them out neatly on a table next to where you’ll be installing your chandelier. You should also make sure that you’ve got someone around to help you handle lifting your chandelier. It can take two people (or more) to get your beautiful creation installed if it weighs more than 25 pounds.
Then, attach your chandelier hangers to each of your mounting brackets. Then, use pliers to screw through one side of each hanger into its respective bracket on your ceiling until you can feel pressure against both sides stop any further movement. This will prevent wobbling when the fixture is hanging by its chains later. Finally, hang your chandelier! Check that everything feels level by placing a spirit level across both of your mounting brackets; then use wire cutters to clip your chains about six inches below where you want them. After completing those steps, simply tug on one end of each chain to dangle your new lighting piece within reach!